Blog

  • Pilea Care 101: How to Grow a Full, Pancake-Leafed Chinese Money Plant

    Pilea Care 101: How to Grow a Full, Pancake-Leafed Chinese Money Plant

    Disclosure: This post contains affiliate links. If you buy through them, Planty Shanty may earn a small commission at no extra cost to you — it’s what keeps our care guides free. As an Amazon Associate, I earn from qualifying purchases. We only recommend gear we’d put next to our own plants.

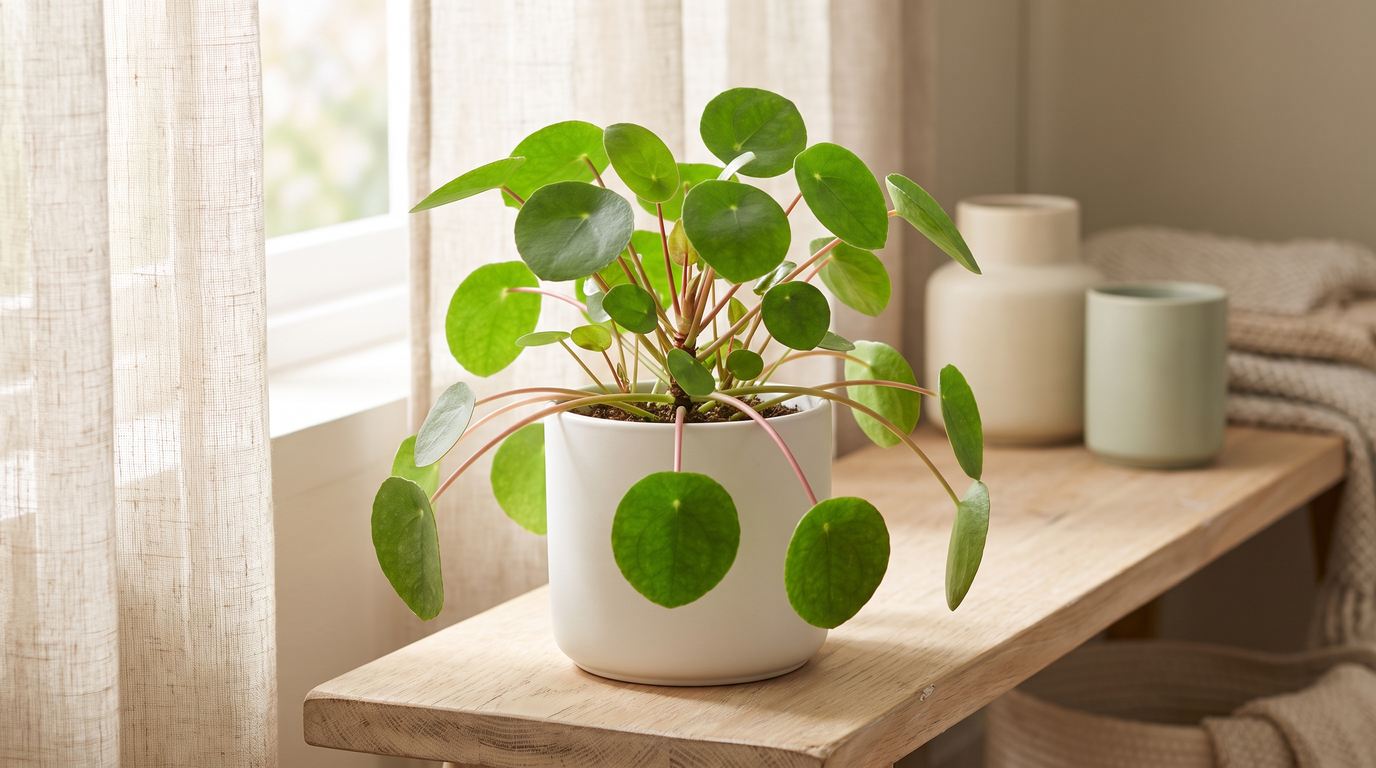
    Some plants are impressive. The Pilea is charming. Round, coin-sized leaves held up on skinny stems like a hundred tiny umbrellas, all leaning cheerfully toward the nearest window. It’s the plant that shows up in every well-styled shelfie for a reason: it’s small, it’s sculptural, and it produces babies so generously that one plant eventually turns into gifts for your whole group chat.

    The Chinese money plant (Pilea peperomioides) also has a reputation for being a little dramatic — leaves curling, stems flopping, the occasional yellow drop-off. Almost all of that traces back to two things: light and water. Get those right and this is one of the easiest, most rewarding houseplants you can own.

    Here’s everything you need to grow a full, upright, pup-producing Pilea.

    1. Meet the Pilea

    Pilea peperomioides comes from the Yunnan province of southern China, where it grows on shaded, damp rock faces at the base of the Himalayas — a detail worth remembering, because it explains basically all of its preferences: bright but filtered light, moisture that comes and goes, and excellent drainage.

    Its journey into our homes is genuinely lovely: a Norwegian missionary brought cuttings home in the 1940s, and for decades the plant spread across Scandinavia purely by people passing pups over the garden fence. It barely existed in the commercial nursery trade until the 2010s. Hence the other nicknames — pass-it-on plant, friendship plant, UFO plant, pancake plant.

    What to expect at home:

    • Size: 8–12 inches tall and about as wide. A true tabletop plant.
    • Growth habit: a single central stem that thickens over time, with leaves on long petioles radiating outward.
    • Pups: offsets emerge from the soil around the base and from the stem itself. Constantly. This is the best part.
    • Pet safety: non-toxic to cats and dogs. One of the few statement plants you don’t have to hide.

    There are a few cultivars floating around — ‘Mojito’ with speckled variegation, ‘White Splash’, and the ruffled ‘Sugar’ — but the classic plain green is the fastest-growing and most forgiving.

    2. Light Requirements

    Pilea wants bright, indirect light. This is the single biggest lever you have over how good it looks.

    • Best: a spot right next to an east-facing window, or a few feet back from a south or west one. Gentle morning sun is perfect.
    • Tolerates: medium light, but expect fewer leaves, longer petioles, and a floppier posture.
    • Avoid: hot direct afternoon sun, which bleaches and crisps those thin leaves fast.

    Two things will tell you the light is wrong. Leaves that curl or dome upward and a stem that stretches with wide gaps between leaves mean it’s reaching for more. Pale, washed-out, or scorched patches mean it’s getting too much direct sun.

    The other non-negotiable: rotate the pot a quarter turn every week. Pilea leans toward light more enthusiastically than almost any houseplant, and without rotation you end up with a permanently lopsided plant. This one habit is the difference between a Pilea that looks styled and one that looks like it’s trying to leave.

    If you’re working with a dim apartment, a full-spectrum LED grow light on a timer for 10–12 hours a day keeps it compact and full through winter.

    3. Watering Routine

    Pilea likes a proper soak followed by a real dry-down. It does not like sitting wet — those succulent-ish stems rot quickly.

    • Water when the top inch of soil is dry — usually every 7–10 days in spring and summer, stretching to every 2 weeks in winter.
    • Water thoroughly until it runs out the drainage hole, then empty the saucer.
    • Bottom-watering works beautifully here: set the pot in a shallow tray of water for 15–20 minutes, then let it drain.

    Reading the signals:

    • Drooping, slightly limp leaves → thirsty. It perks back up within hours.
    • Yellow lower leaves that drop, soil still damp → overwatered. Back off immediately.
    • Brown crispy edges → too dry, or a dry-air-plus-underwatering combo.
    • Leaves curling downward at the edges → often overwatering; curling upward is more often light or heat.

    Because Pilea pots are small and dry out unevenly, a cheap soil moisture meter is genuinely useful — the top can feel dry while the root ball is still soaked.

    4. Ideal Soil Mix

    Fast-draining and airy. Pilea roots are fine and shallow, and they suffocate in dense soil.

    Start with a quality indoor potting mix and cut it with a generous handful of perlite — about 3 parts mix to 1 part perlite. A scoop of orchid bark adds even more air if you tend to overwater. Avoid heavy garden soil and anything marketed as moisture-retaining.

    Pot choice matters more than usual. Pilea has a small root system, so use a pot only slightly wider than the root ball — 4–6 inches for most plants. Oversized pots stay wet in the middle and cause rot. Terracotta is ideal because it wicks moisture away. And always, always a drainage hole.

    5. Fertilizing

    Pilea is a light feeder, but it grows fast in season and will use the food.

    • Feed every 4 weeks in spring and summer with a balanced liquid houseplant fertilizer at half strength.
    • Stop entirely in fall and winter.
    • Water first, then feed. Fertilizing dry roots burns them.

    Over-fertilizing shows up as brown leaf edges and a white crust on the soil surface. If you see that, flush the pot under the tap for a minute or two and skip a few feedings.

    6. Temperature & Humidity

    Comfortably average — your living room is probably already right.

    • Temperature: 60–75°F. Keep it above 55°F and away from cold windowpanes in winter, heating vents, and AC drafts.
    • Humidity: 40–50% is plenty. It appreciates a bit more but doesn’t demand it.

    Pilea is more sensitive to cold drafts than to dry air. A plant pressed against a freezing window in January will drop leaves fast. If your winter air is genuinely arid and you’re seeing crispy edges across several plants, a small cool-mist humidifier nearby helps — but don’t mist the leaves directly. Water sitting on those flat surfaces invites fungal spotting.

    7. Repotting & Propagating the Pups

    Repot every 1–2 years in spring, going up just one pot size. Signs it’s time: roots circling the bottom, water running straight through, or growth stalling in good conditions.

    Refresh the top inch of soil each spring even in years you don’t repot.

    Now the fun part. Pilea produces two kinds of offsets:

    • Root pups push up through the soil a few inches from the mother plant. Once one is 2–4 inches tall, dig down with a clean knife, cut it away with a bit of root attached, and pot it in its own small container of the same mix.
    • Stem pups appear directly on the main stem. Slice them off flush with a clean blade and root the cutting in water — a jar on the windowsill, roots in 2–3 weeks — then pot up. A dab of rooting hormone speeds soil-rooting along.

    Use clean, sharp pruning shears or a snips-style blade so you don’t crush the tissue. Removing pups also pushes the mother plant to put energy into its own leaves — so harvesting is good for both.

    If your Pilea has gone leggy with a bare lower stem, don’t panic: that’s normal maturity. You can either lean into the little-tree look, or behead the top, root it, and start fresh.

    8. Common Problems & Pests

    • Leaves curling or doming upward: usually too much light or heat; sometimes underwatering. Move it slightly back from the window.
    • Yellowing lower leaves dropping off: overwatering is the usual culprit. Some loss of the oldest leaves is normal.
    • Leggy stem, sparse leaves: not enough light, plus no rotation. Brighten it up and start turning the pot weekly.
    • Leaning hard to one side: rotate the pot. Every week. That’s the whole fix.
    • Brown crispy edges: dry air, fertilizer salt buildup, or inconsistent watering. Flush the soil and even out your rhythm.
    • Sudden collapse with mushy stem base: root rot. Unpot immediately, cut away black mushy roots, repot in fresh dry mix — and salvage any healthy pups as insurance.
    • Pests: fungus gnats are the most common, and they’re a symptom of soil kept too wet — let it dry out and top with a layer of coarse sand. Also watch for spider mites in dry air and the occasional mealybug in leaf joints. Wipe with rubbing alcohol on a cotton pad, then treat with neem oil weekly until they’re gone.

    Frequently Asked Questions

    Why is my Pilea’s stem so long and bare at the bottom? That’s normal aging — Pilea drops its oldest lower leaves as the trunk thickens. Insufficient light accelerates it. Move it brighter, keep rotating, and either enjoy the tree shape or propagate the top and restart.

    Why aren’t my leaves round and flat anymore? Curling and doming almost always mean light stress — too much direct sun, or heat from a nearby vent or radiator. Move it a foot or two back from the glass and the new leaves will come in flat.

    How do I get my Pilea to make more babies? Good light, a snug pot, consistent watering, and light feeding in spring and summer. Healthy mature plants pup readily; a stressed one puts everything into survival instead.

    Are Chinese money plants safe for cats and dogs? Yes — Pilea peperomioides is considered non-toxic to pets and people. Nibbling still isn’t great for anyone, but it’s not a danger.

    Can I propagate Pilea from a single leaf? Not reliably. Unlike some Peperomia, a Pilea leaf without a piece of stem or root rarely produces a new plant. Stick to root pups and stem pups.

    Why does my Pilea have white spots on the leaves? Often mineral deposits from hard water or fertilizer salts, which wipe off. Fuzzy or raised spots that don’t wipe away point to mealybugs or a fungal issue instead.

    Quick Gear Checklist

    Bright indirect light, a snug pot that drains, a weekly quarter turn, and a soak-then-dry rhythm — that’s the whole Pilea playbook. Do that and within a year you’ll have more baby plants than windowsills. Which is, honestly, the correct number. Happy growing, from all of us at Planty Shanty. ðŸŒą

  • Rubber Plant Care 101: How to Grow a Glossy, Tree-Sized Ficus elastica Indoors

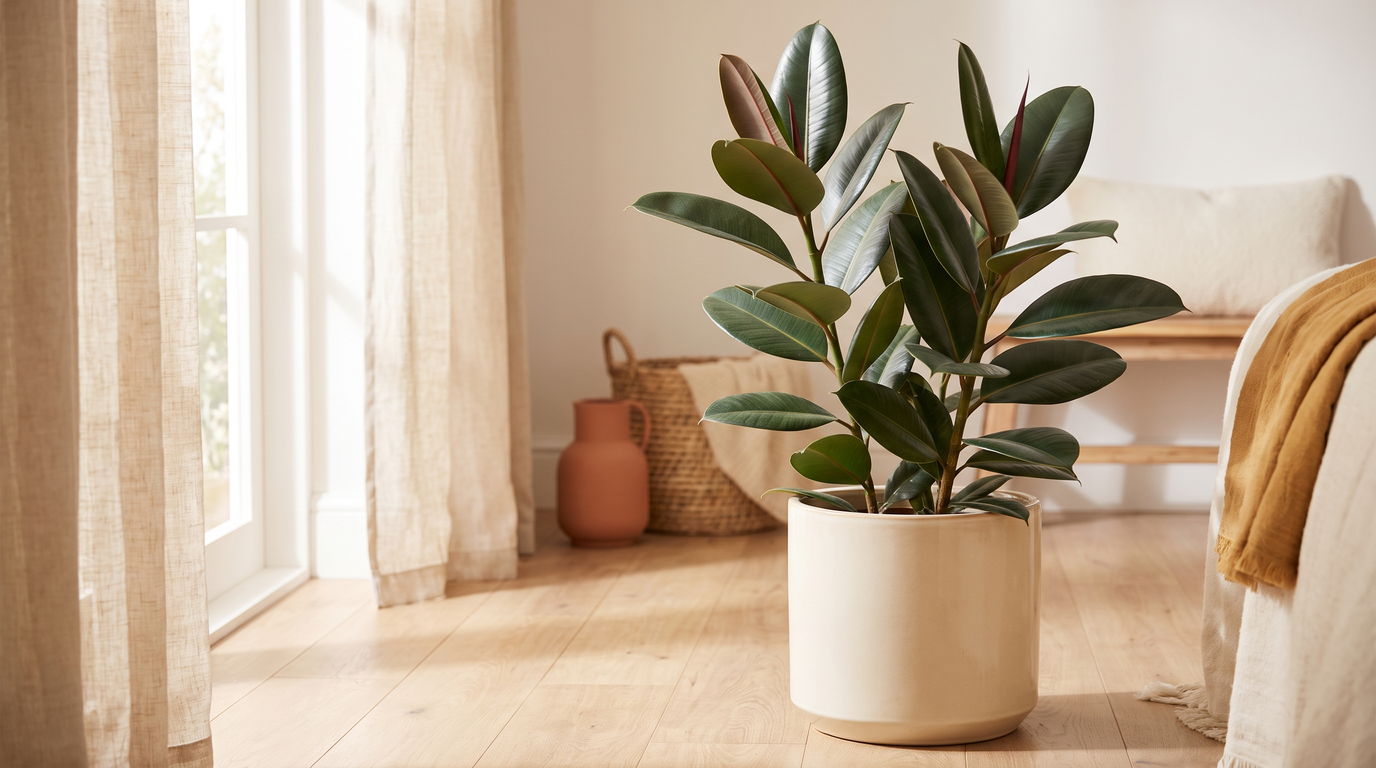
    Rubber Plant Care 101: How to Grow a Glossy, Tree-Sized Ficus elastica Indoors

    Disclosure: This post contains affiliate links. If you buy through them, Planty Shanty may earn a small commission at no extra cost to you — it’s what keeps our care guides free. As an Amazon Associate, I earn from qualifying purchases. We only recommend gear we’d put next to our own plants.

    There’s a moment every plant person hits where the little pots on the windowsill aren’t enough anymore and you want presence — something with a trunk, something that fills the empty corner next to the sofa. That’s the rubber plant. Big, patent-leather leaves in deep green or burgundy, a habit that goes from tabletop to ceiling-scraper in a few years, and — unlike its famously moody cousin the fiddle leaf fig — a temperament that actually forgives you.

    If you’ve been eyeing one at the garden center, or you brought one home and it’s dropping leaves and you’re panicking a little: this is your guide. Let’s get that Ficus glossy.

    1. Meet the Rubber Plant

    Ficus elastica is native to the forests of South and Southeast Asia, where it grows into a genuinely enormous tree — 100 feet plus. Indoors it stays a very manageable 6–10 feet, and you’re in full control of that with pruning. The common name comes from its milky white sap (latex), which was once tapped for rubber production. That same sap is why the plant is mildly toxic and why pruning gets a little drippy — more on both later.

    The varieties you’ll actually run into:

    • ‘Robusta’ — the classic, with wide deep-green leaves. The most forgiving of the bunch.
    • ‘Burgundy’ (sometimes sold as ‘Black Prince’) — near-black leaves with a red midrib. Stunning, and needs a bit more light to hold that color.
    • ‘Tineke’ — variegated cream, green, and gray. Slower-growing and thirstier for light.
    • ‘Ruby’ — pink-and-cream variegation. The showstopper, and the fussiest.

    Buy the plainest variety if you’re new to Ficus, and the variegated ones once you’ve got a bright spot to spare. Variegated leaves have less chlorophyll, which means less margin for error in a dim room.

    2. Light Requirements

    Rubber plants want bright, indirect light — think a spot a few feet back from a south or west window, or right in an east-facing one where they’ll catch gentle morning sun.

    • Best: bright and indirect, ideally 6+ hours a day.
    • Tolerates: medium light, with slower growth and more spacing between leaves.
    • Avoid: harsh direct afternoon sun, which scorches those big leaf surfaces into pale bleached patches.

    Here’s the tell that your plant wants more light: leggy growth. If the stem is stretching with big bare gaps between leaves, or the lower leaves are yellowing and dropping while new ones come in small, it’s reaching for a window it can’t find. Variegated types will also fade toward plain green in low light.

    Dark apartment? A full-spectrum LED grow light on a timer for 10–12 hours a day genuinely fixes this. And rotate the pot a quarter turn every couple of weeks so it grows straight rather than leaning like it’s trying to escape.

    3. Watering Routine

    This is where most rubber plants get into trouble, and the fix is simple: water thoroughly, then let it dry down.

    • Water when the top 1–2 inches of soil feel dry — usually every 7–14 days in spring and summer, and noticeably less in winter.
    • Soak until water runs out the drainage hole, then dump the saucer. Never let the pot sit in a puddle.
    • In winter, back off. Cool temperatures plus wet soil is the fastest way to root rot.

    Rubber plants are quiet about being thirsty and loud about being overwatered. Drooping leaves usually mean underwatered. Yellow lower leaves that drop, plus soil that never seems to dry means overwatered — and that’s the one that kills.

    Because those big pots dry unevenly, a cheap soil moisture meter takes the guessing out of it. Push it deep, not just into the top inch.

    4. Ideal Soil Mix

    Rubber plants aren’t precious about soil — they just need it to drain fast. A dense, water-retentive mix in a big pot is the classic rot setup.

    Start with a quality indoor potting mix and lighten it up with a generous scoop of perlite — roughly 3 parts soil to 1 part perlite. If you already keep aroids, a chunky aroid potting mix works beautifully here too.

    Drainage hole, always. If you’re using a pretty cachepot with no hole, keep the plant in its plastic nursery pot and slip it inside — that way you can water at the sink and let it drain properly.

    5. Fertilizing

    Rubber plants are fast growers when they’re happy, and they’ll use the food.

    • Feed every 4–6 weeks in spring and summer with a balanced liquid houseplant fertilizer, diluted to half strength.
    • Stop feeding in fall and winter while growth slows down.
    • Always water first, then feed — fertilizing bone-dry roots can burn them.

    Brown crispy leaf edges on a plant that’s otherwise well-watered often means salt buildup from fertilizer. Flush the pot with plain water in the sink for a minute or two every few months and that problem goes away.

    6. Temperature & Humidity

    Good news: your house is probably already right.

    • Temperature: 60–80°F is the sweet spot. Keep it above 55°F, and away from cold drafts, radiators, and AC vents.
    • Humidity: average household humidity (around 40–50%) is fine. It won’t say no to more.

    The real enemy is sudden change. A rubber plant moved abruptly from a humid greenhouse to a dry living room, or parked next to a drafty door in January, will drop leaves in protest. That’s usually shock, not death — put it somewhere stable, keep watering normally, and it recovers.

    If your winter air is desert-dry and you’re seeing crispy edges, a small cool-mist humidifier nearby helps.

    7. Repotting & Pruning

    Repot every 2–3 years, in spring, when roots start circling the pot or poking out of the drainage holes.

    • Go up just one pot size (about 2 inches wider). An oversized pot holds water the roots can’t use.
    • Terracotta is a great choice here — it breathes and dries faster.
    • Once the plant is too big to repot comfortably, just top-dress: scrape off the top 2 inches of old soil and replace it with fresh mix each spring.

    Pruning is your superpower with this plant. Rubber plants naturally grow as a single unbranched stalk unless you intervene. Cut the top off (any time in spring or summer) and the plant pushes out two or more new branches just below the cut — that’s how you get a full, tree-shaped specimen instead of a lonely pole. Use clean, sharp pruning shears.

    Two things to know: the cut will ooze white latex sap, so lay down newspaper and wear gloves — it’s sticky and it irritates skin. And that cutting you just took? Root it in water or moist soil and you’ve got a free second rubber plant.

    While you’re at it, wipe the leaves. Those big glossy surfaces collect dust fast, and dust blocks light. A damp microfiber cloth every few weeks keeps them shining and lets the plant actually photosynthesize.

    8. Common Problems & Pests

    • Dropping leaves: the signature rubber plant complaint. Causes, in order of likelihood: sudden environment change, cold draft, overwatering, or a big swing in light. Stabilize conditions and stop fussing.
    • Yellowing lower leaves: almost always overwatering. Check that the soil isn’t staying wet for more than a week.
    • Brown crispy edges: low humidity, salt buildup, or underwatering. Flush the soil and check your watering rhythm.
    • Pale bleached patches: sunburn from direct afternoon sun. Move it back from the glass.
    • Leggy stem, small new leaves: not enough light. Move it brighter and prune the top to force branching.
    • Pests: scale is the big one on Ficus — look for small brown bumps along stems and leaf undersides. Also watch for spider mites in dry air and the occasional mealybug. Wipe them off with rubbing alcohol on a cotton pad, then treat with neem oil, repeating weekly until they’re gone.

    Safety note: the milky sap is mildly toxic to cats, dogs, and humans if chewed, and can irritate skin on contact. Keep it out of reach of pets and toddlers, and glove up when pruning.

    Frequently Asked Questions

    Why is my rubber plant dropping leaves? Nine times out of ten it’s a change — you just brought it home, moved it, or the seasons turned and a draft found it. Give it a consistent spot with good light, water on a dry-down schedule, and stop moving it. New growth usually resumes within a few weeks.

    How do I make my rubber plant bushy instead of a single tall stalk? Prune the top. Cutting the main stem in spring or summer forces the plant to branch below the cut. You can repeat this as it grows to build a full canopy.

    How fast do rubber plants grow? In good light, surprisingly fast — 12–24 inches a year is normal, and they can reach 6–10 feet indoors. Pruning keeps them at whatever height you want.

    Can I propagate a rubber plant from a cutting? Yes. Take a stem cutting with 2–3 leaves, rinse off the sap, and root it in water or moist potting mix with a little rooting hormone. Roots typically appear in 3–6 weeks. Air layering works even better on thick stems.

    Are rubber plants safe for cats and dogs? No — the sap is mildly toxic and irritating if chewed. It’s not usually life-threatening, but it’s worth placing this one out of reach.

    Why are my variegated leaves turning plain green? Not enough light. Variegated cultivars like ‘Tineke’ and ‘Ruby’ need brighter conditions to hold their pattern.

    Quick Gear Checklist

    Give a rubber plant bright indirect light, a pot that drains, and the confidence to prune it, and it will turn into the tree-sized statement piece your corner has been waiting for. It’s one of the few big-impact houseplants that genuinely forgives a missed watering. Happy growing, from all of us at Planty Shanty. ðŸŒą

  • Anthurium Care 101: How to Keep Those Glossy Red “Flowers” Blooming

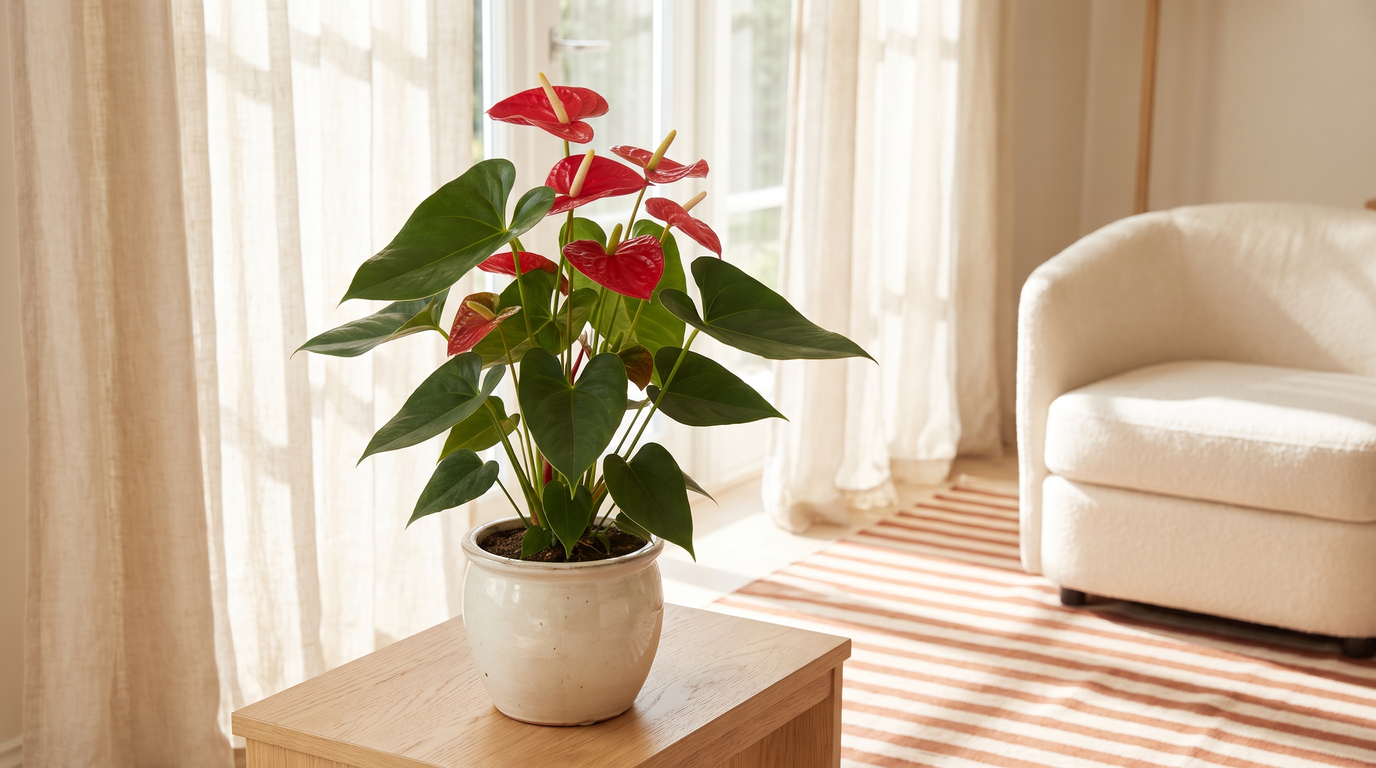
    Anthurium Care 101: How to Keep Those Glossy Red “Flowers” Blooming

    Disclosure: This post contains affiliate links. If you buy through them, Planty Shanty may earn a small commission at no extra cost to you — it’s what keeps our care guides free. As an Amazon Associate, I earn from qualifying purchases. We only recommend gear we’d put next to our own plants.

    Few houseplants photograph as well as an Anthurium. Those waxy, heart-shaped red “blooms” look almost too perfect to be real — and in a way, they aren’t flowers at all. If you’ve ever wondered why your grocery-store Anthurium stopped blooming, dropped its shine, or started browning at the tips, you’re in the right place. This is the plant that looks fussy but is genuinely easy once you nail two things: light and watering. Let’s get your Anthurium blooming on repeat.

    1. Meet the Anthurium

    Anthurium (Anthurium andraeanum is the classic flamingo flower you see everywhere) belongs to the aroid family — the same clan as Monstera, Pothos, and Philodendron. That glossy red “petal” is actually a modified leaf called a spathe, and the little tail poking up from it is the spadix, where the true, tiny flowers live.

    A few types you’ll run into:

    • Anthurium andraeanum — the shiny, heart-shaped flamingo flower in red, pink, white, or coral.
    • Anthurium scherzerianum — similar but with a curly, pigtail-shaped spadix.
    • Anthurium clarinervium — grown for its dramatic velvety, white-veined foliage rather than blooms.
    • Anthurium crystallinum — another stunning foliage type with silver veining.

    The blooming types can flower nearly year-round indoors when they’re happy — which is exactly the payoff we’re aiming for.

    2. Light Requirements

    Light is the number-one lever for blooms. Anthuriums are understory plants from tropical rainforests, so they want brightness without harsh sun.

    • Best: bright, indirect light — an east-facing window, or a few feet back from a south or west window.
    • Tolerates: medium light, but expect fewer or no blooms.
    • Avoid: direct midday sun, which scorches the leaves and fades the spathes.

    Too little light is the most common reason an Anthurium refuses to rebloom. If your space is dim, a LED grow light on a timer makes a real difference and keeps that foliage glossy.

    3. Watering Routine

    Anthuriums like consistent moisture but despise soggy roots — it’s a balance, not a schedule.

    • Water when the top inch or two of soil feels dry. Usually about once a week, less in winter.
    • Water thoroughly until it drains from the bottom, then empty the saucer — never let it sit in standing water.
    • Wilting or drooping often means thirsty; yellowing lower leaves and mushy stems mean overwatered.

    Because those thick roots rot easily, take the guesswork out with a cheap soil moisture meter. If your tap water is heavily chlorinated, Anthuriums appreciate filtered or rainwater — they can be a little sensitive to salts.

    4. Ideal Soil Mix

    Here’s the secret most people miss: Anthuriums are epiphytes, meaning in the wild they cling to trees rather than growing in dense dirt. They want a chunky, airy mix that drains fast and lets roots breathe.

    Reach for a loose aroid potting mix, or make your own by combining regular potting soil with generous handfuls of orchid bark and perlite. The goal is a mix that never packs down into a dense, waterlogged brick. Always use a pot with a drainage hole.

    5. Fertilizing

    To fuel those blooms, Anthuriums appreciate a little help during the growing season. Use a fertilizer formulated for blooming or flowering houseplants — one with a bit more phosphorus encourages spathes.

    • Feed every 6–8 weeks in spring and summer, diluted to about half strength.
    • Ease off in fall and winter, when growth naturally slows.

    Over-fertilizing shows up as brown, crispy leaf tips, so when in doubt, feed lighter.

    6. Temperature & Humidity

    This is a tropical plant, and it doesn’t hide it.

    • Temperature: happiest at 65–80°F. Keep it above 60°F and away from cold drafts, AC vents, and chilly windowsills.
    • Humidity: loves it high — 60% or more. Dry indoor air causes browning leaf edges and stalled blooms.

    Boost humidity by grouping plants together, setting the pot on a pebble tray, or running a small cool-mist humidifier nearby — bathrooms and kitchens with good light are naturally great Anthurium spots.

    7. Repotting

    Anthuriums like to be slightly snug, so repot only every 2–3 years, or when you see roots creeping out of the drainage holes or poking above the soil line.

    • Move up just one pot size — too big a pot holds excess water and invites rot.
    • Spring is the ideal time.
    • If aerial roots surface, tuck them under fresh mix or wrap them loosely with damp sphagnum moss.

    You can also divide a mature, clumping plant at repotting time for a free second Anthurium — just separate a section with roots attached and pot it up.

    8. Common Problems & Pests

    • No blooms: almost always too little light, or too much nitrogen fertilizer. Move it brighter and switch to a bloom formula.
    • Brown, crispy leaf tips: low humidity, salt buildup, or over-fertilizing. Raise humidity and flush the soil occasionally.
    • Yellowing leaves: usually overwatering — check that the roots aren’t sitting wet.
    • Faded or greenish spathes: older blooms naturally fade and green out before dropping; trim them off. If new blooms come in green, it usually needs more light.
    • Pests: watch for mealybugs, aphids, and spider mites, especially in dry air. Wipe them off and treat with neem oil.

    One safety note: Anthuriums are toxic to pets and people if chewed — the sap contains calcium oxalate crystals that irritate the mouth and throat. Keep them out of reach of curious cats, dogs, and toddlers.

    Frequently Asked Questions

    Why won’t my Anthurium rebloom? Nine times out of ten, it’s light. These plants need consistently bright, indirect light to push out spathes. A bloom-focused fertilizer in spring and summer helps too.

    Are the red flowers real flowers? Not exactly — the colorful red part is a spathe (a modified leaf), and the true flowers are the tiny bumps on the tail-like spadix. Cutting the spadix won’t hurt the plant.

    How long do the blooms last? Individual spathes can stay colorful for 6–8 weeks or more, and a healthy plant produces new ones throughout the year.

    Can I grow Anthurium in just water or moss? Yes — many growers keep them in semi-hydro or pure sphagnum moss because those roots love airflow. Just watch feeding and rinse the medium periodically.

    Quick Gear Checklist

    Give an Anthurium bright indirect light, an airy mix that never stays soggy, and a little humidity, and it will reward you with those iconic glossy blooms again and again. It’s proof that a plant can be a showstopper and low-drama at the same time. Happy growing, from all of us at Planty Shanty. ðŸŒą

  • Alocasia Care 101: How to Keep These Dramatic Jungle Divas Thriving Indoors

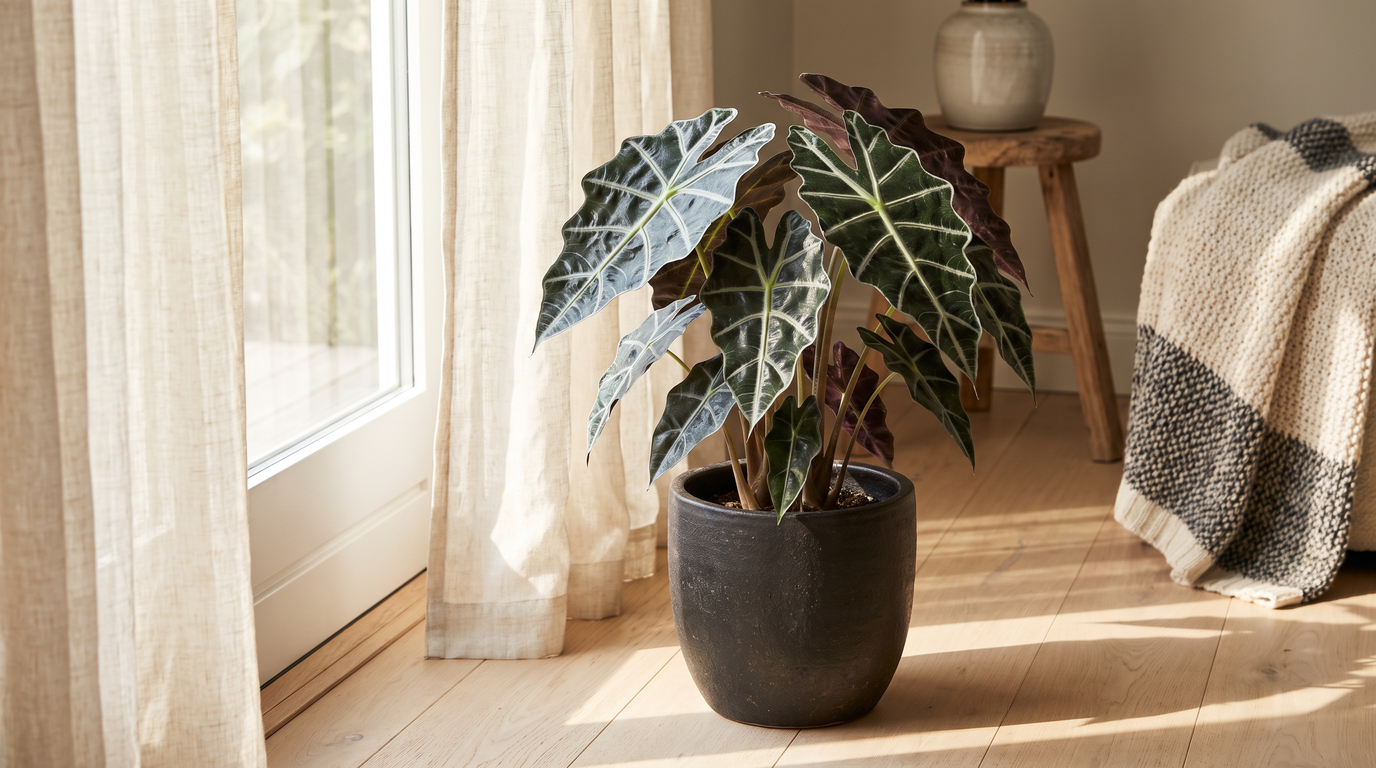
    Alocasia Care 101: How to Keep These Dramatic Jungle Divas Thriving Indoors

    Disclosure: This post contains affiliate links. If you buy through them, Planty Shanty may earn a small commission at no extra cost to you — it’s what keeps our care guides free. As an Amazon Associate, I earn from qualifying purchases. We only recommend gear we’d put next to our own plants.

    Few houseplants make an entrance quite like an Alocasia. Those arrowhead leaves — glossy, sculptural, sometimes veined like stained glass — turn a bare corner into something out of a rainforest. They also have a reputation: dramatic, a little demanding, prone to throwing a leaf when they’re unhappy. But here’s the secret we tell every nervous new owner: Alocasias aren’t hard, they’re just honest. Give them what they’d get on a tropical forest floor — warmth, humidity, bright filtered light, and a fast-draining pot — and they’ll reward you with leaf after gorgeous leaf. Here’s exactly how to do it.

    1. Meet the Alocasia

    Alocasia (often called Elephant Ear or African Mask plant) is a genus of tropical rhizome-growers native to the humid understory of Asia and eastern Australia. There are dozens of showstoppers to collect:

    • Alocasia Polly / Amazonica — the classic “African Mask,” with wavy-edged dark leaves and bright white veins.
    • Alocasia Zebrina — prized as much for its zebra-striped stems as its arrowhead leaves.
    • Alocasia Frydek — velvety, deep-green leaves with crisp white veining.
    • Alocasia Black Velvet — compact, jewel-like, almost-black textured leaves.
    • Alocasia Regal Shield — a big, bold hybrid that can reach dramatic, floor-plant proportions.

    One thing that surprises new owners: Alocasias grow from a rhizome or corm, which means they naturally cycle through active growth and rest. A leaf dying back isn’t always a crisis — sometimes it’s just the plant reallocating energy. More on that below.

    2. Light Requirements

    Think bright, indirect light — the dappled brightness of a forest canopy, not the blazing exposure of an open field.

    • Best growth: a few feet back from a bright east- or west-facing window, or near a sheer-curtained south window.
    • Tolerates: medium light, though growth slows and new leaves come smaller.
    • Avoid: harsh, direct midday sun, which scorches those thin leaves and fades the color.

    Too little light is the quiet killer here — Alocasias in dim corners tend to stall, drop leaves, and sulk. If your space runs dark, especially through winter, a full-spectrum LED grow light makes an enormous difference and keeps the veining crisp.

    3. Watering Routine

    Alocasias like to stay evenly moist — but never soggy. This is the tightrope that trips people up: they hate drying out completely, and they hate sitting in water even more.

    • Water when the top inch or two of soil feels dry — usually every few days in summer, less in winter.
    • Water thoroughly until it runs from the drainage hole, then empty the saucer so the roots never sit in water.
    • Use room-temperature water; cold water shocks the roots.

    Because that “moist but not wet” window is narrow, a cheap soil moisture meter is genuinely worth it here — it removes the guesswork that leads to both crispy edges (too dry) and yellowing, mushy stems (too wet). Alocasias are also sensitive to the fluoride and chlorine in some tap water; if you see stubborn brown tips, try filtered or rainwater, or let tap water sit out overnight before using.

    4. Ideal Soil Mix

    Drainage and aeration are everything. A dense, water-logging soil is the fastest route to root rot. Aim for a chunky, airy, aroid-style mix that holds a little moisture but drains fast.

    An easy DIY blend: equal-ish parts potting soil, orchid bark, perlite, and a handful of coco coir for moisture retention. Prefer to skip the mixing bowl? A ready-made aroid potting mix does the job beautifully. Whatever you use, always pot in a container with a drainage hole.

    5. Fertilizing

    These are hungry plants during their growing season. Feed with a diluted balanced houseplant fertilizer every 2–4 weeks in spring and summer to fuel all that leaf production. Ease off in fall and stop entirely in winter, when growth naturally slows. Over-fertilizing causes salt buildup and brown, burnt leaf edges — when in doubt, dilute more and feed less.

    6. Temperature & Humidity

    This is where Alocasias show their tropical roots most clearly.

    • Temperature: happiest at 65–80°F. Keep them above 60°F and away from cold drafts, AC vents, and chilly windowsills — a sudden cold snap can send them into dormancy.
    • Humidity: they crave it — 60% or higher is ideal. Average indoor air is often too dry, which shows up as crispy edges and stalled growth.

    Grouping plants together helps, but the reliable fix is a cool-mist humidifier running nearby. A pebble tray adds a little boost too. A small hygrometer takes the mystery out of whether your air is actually humid enough.

    7. Repotting

    Alocasias like to be slightly snug in their pots and bloom into their best growth when a little root-bound, so don’t rush to size up. Repot every 1–2 years, ideally in spring, when you see roots creeping from the drainage hole or the plant drying out unusually fast.

    Move up just one pot size, refresh with fresh airy mix, and be gentle with the rhizome. Repotting is also the perfect moment to check for pups (see next section) and to inspect the roots — healthy ones are firm and pale; mushy, brown roots mean it’s time to trim rot and refresh the soil. A snug pot also lets the soil dry at a sane pace, which helps you avoid overwatering.

    8. Propagation

    Alocasias don’t propagate from leaf or stem cuttings the way pothos does — they multiply by producing offsets (“pups”) from the rhizome. The easiest method:

    1. At repotting time, gently loosen the soil and look for small pups with their own roots attached to the main clump.
    2. Separate a well-rooted pup by hand (or with a clean, sharp knife), keeping as many roots as possible.
    3. Pot it in its own small container of airy mix, keep it warm and humid, and be patient while it establishes.

    You can also find small corms in the soil — bead-like nodules that can be sprouted in damp sphagnum moss inside a warm, humid container. It’s slow, but deeply satisfying when a new leaf finally unfurls.

    9. Common Problems & Pests

    • Yellowing leaves: most often overwatering — check that the soil isn’t staying soggy and that the pot drains freely.
    • Crispy brown edges/tips: low humidity, underwatering, or sensitivity to minerals in tap water.
    • Drooping: usually thirst or a temperature/light shock; check the soil before assuming the worst.
    • Sudden leaf loss / dormancy: cold, low light, or seasonal rest. If the rhizome is firm, keep it barely moist and warm — new growth often returns when conditions improve.
    • Pests: Alocasias are magnets for spider mites (especially in dry air), plus the occasional mealybug or thrips. Inspect leaf undersides regularly, wipe them down, and treat with neem oil or an insecticidal soap. Boosting humidity is your best spider-mite prevention.

    Frequently Asked Questions

    Why does my Alocasia keep dropping leaves? A little leaf turnover is normal — Alocasias often sacrifice an old leaf for each new one. Rapid loss usually points to overwatering, cold drafts, low light, or a plant slipping into dormancy. Check conditions before panicking; if the rhizome is firm, it can bounce back.

    Is Alocasia toxic to pets? Yes — like most aroids, Alocasias contain insoluble calcium oxalate crystals and are toxic to cats, dogs, and humans if chewed. Keep them well out of reach of curious pets and kids.

    Why is my Alocasia “crying” or dripping water? Those droplets on the leaf tips are guttation — completely normal, and often a sign the plant is well-watered and happy. Just wipe them so they don’t leave mineral spots.

    Do I need to mist it? Misting offers only a brief humidity bump and can invite fungal issues on those velvety leaves. A humidifier is a far more reliable way to keep humidity high.

    Quick Gear Checklist

    Alocasias have a reputation for drama, but really they just wear their feelings on their leaves. Learn to read them — warmth, humidity, bright filtered light, and a fast-draining pot — and these jungle divas will unfurl one jaw-dropping leaf after another. Happy growing, from all of us at Planty Shanty. ðŸŒą

  • Syngonium Care 101: The Fast-Growing Arrowhead Plant Anyone Can Keep Lush

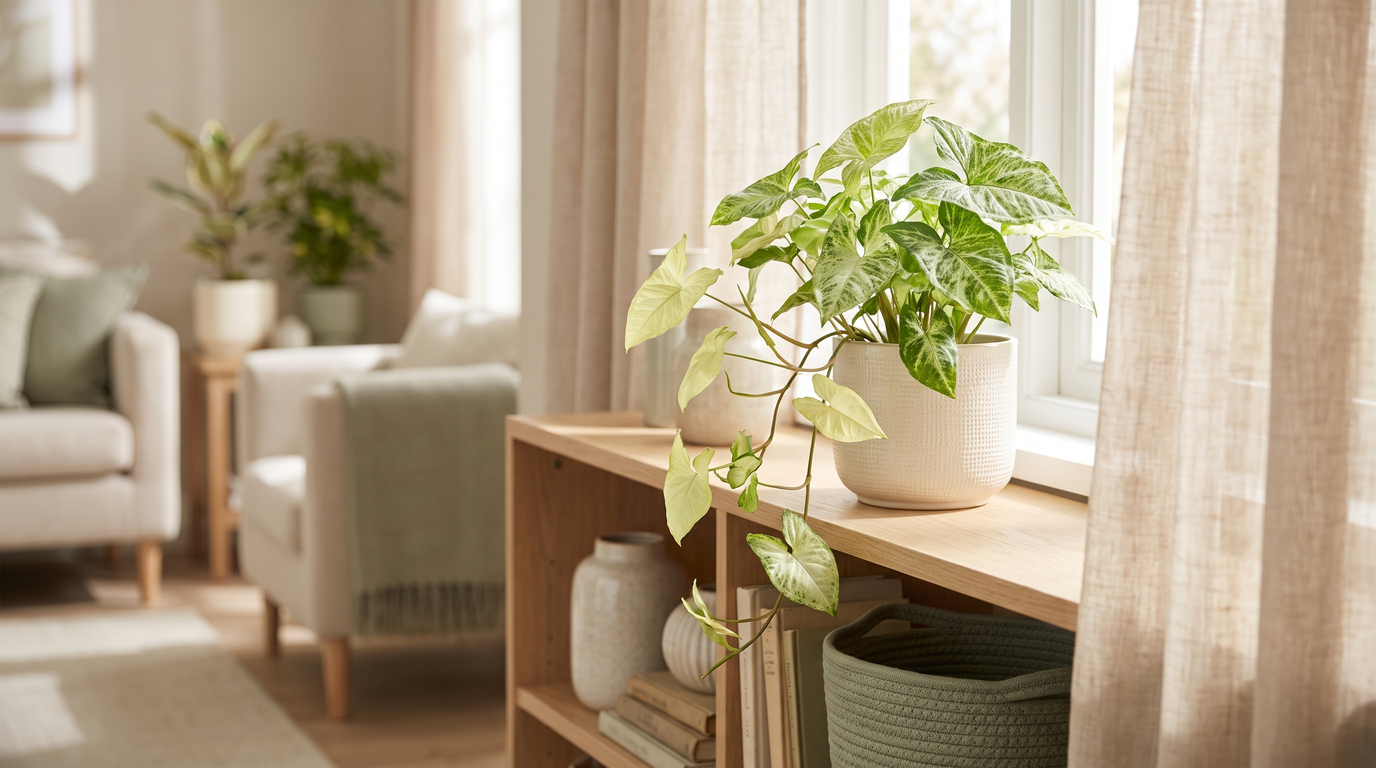
    Syngonium Care 101: The Fast-Growing Arrowhead Plant Anyone Can Keep Lush

    Disclosure: This post contains affiliate links. If you buy through them, Planty Shanty may earn a small commission at no extra cost to you — it’s what keeps our care guides free. As an Amazon Associate, I earn from qualifying purchases. We only recommend gear we’d put next to our own plants.

    If Pothos and Philodendron are the gateway plants of the houseplant world, the Syngonium — better known as the Arrowhead Plant — is the one that turns a casual grower into a collector. It’s just as forgiving as those beginner favorites, but it comes in a jaw-dropping range of colors: soft pinks, creamy whites, minty neons, and speckled confetti splashes. It grows fast, roots in a glass of water almost overnight, and morphs its leaf shape as it matures. Here’s how to keep an Arrowhead full, colorful, and thriving — whether you want it bushy on a shelf or vining up a pole.

    1. Meet the Syngonium

    The Syngonium (Syngonium podophyllum), native to the tropical rainforests of Central and South America, is an aroid — a cousin of Pothos, Philodendron, and Monstera. Its charm is in its transformation: young leaves emerge as neat little arrowheads, and as the plant matures and starts to climb, those same leaves develop deep lobes and split into three, five, or more sections. Two plants of the same variety can look completely different depending on their age and whether they’re trailing or climbing.

    A few of the most-loved varieties:

    • White Butterfly — the classic, with pale sage-green leaves and creamy centers.
    • Pink Allusion / Neon Robusta — blush-pink to bubblegum leaves that stay pink in good light.
    • Berry Allusion — soft green with pink veining, a subtle stunner.
    • Confetti / Mottled — green leaves freckled with pink speckles.
    • Albo Variegata — dramatic white-and-green variegation; rarer and slower.

    Syngonium is a genuinely fast grower in the warm season, so it rewards you quickly — and forgives the occasional misstep just as fast.

    2. Light Requirements

    Light is the dial that controls your Arrowhead’s color, so it’s worth getting right.

    • Best growth & color: bright, indirect light. This is where pinks stay pink and variegation stays crisp.
    • Tolerates: medium light — it’ll keep growing, but colorful varieties fade toward green and growth slows.
    • Avoid: harsh, direct afternoon sun, which scorches those thin leaves and bleaches the color.

    The all-green types (like the plain Arrowhead) handle lower light better than the pink and white cultivars, which are hungrier for brightness. If your colorful Syngonium is reverting to green or getting leggy, that’s your cue it wants more light — a LED grow light on a timer restores the vibrance beautifully. Rotate the pot every couple of weeks so it grows evenly.

    3. Watering Routine

    Syngoniums like to stay lightly moist — more thirsty than a Snake Plant, less needy than a fern. The sweet spot is easy to hit.

    • Water when the top 1–2 inches of soil feel dry to the touch.
    • In the growing season that’s often once a week; in winter, stretch it out as growth slows.
    • Water thoroughly until it drains from the bottom, then empty the saucer — never let it sit in water.

    Reading your plant: droopy, limp stems that perk back up after a drink mean it got a little too dry (no harm done). Yellowing lower leaves and a persistently soggy base point to overwatering, the more common danger. If you tend to over-love your plants, a cheap soil moisture meter takes the guesswork out entirely.

    4. Ideal Soil Mix

    Like all aroids, Syngonium wants a mix that holds some moisture but drains fast and stays airy around the roots. Dense, compacted soil is the enemy.

    Start with a quality indoor potting mix and lighten it with a generous handful of perlite for drainage. For an even better aroid blend, work in some orchid bark to create the chunky, breathable structure these roots love.

    Always pot into a container with a drainage hole. A terracotta or ceramic pot with drainage keeps roots healthy and makes overwatering much harder to do.

    5. Fertilizing

    Fast growers appreciate a steady, gentle feed. During spring and summer, apply a diluted balanced houseplant fertilizer every 2–4 weeks to fuel all that new foliage. Ease off in fall and stop entirely in winter, when the plant is resting. As always, under-feeding is safer than over-feeding — too much can brown the leaf tips and burn the roots.

    6. Temperature & Humidity

    This is a tropical plant, and it shows.

    • Temperature: happiest between 65–85°F. Keep it above 60°F and away from cold drafts, AC vents, and chilly winter windows.
    • Humidity: loves moisture in the air — 50%+ is ideal. It’ll survive average household humidity, but you’ll get lusher leaves and fewer crispy edges with a boost.

    Group it with other plants, set it near the kitchen or bathroom, or run a small room humidifier in dry winter months. Brown, crispy leaf edges are the classic sign your Arrowhead wants more humidity.

    7. Pruning & Repotting

    Pruning is your styling tool. Left alone, a Syngonium naturally shifts from a bushy mound to a trailing vine. To keep it full and compact, simply pinch or snip the growing tips with clean pruning shears — it responds by branching out bushier. To let it climb and show off those mature lobed leaves, give it a moss pole to scramble up.

    Repotting: thanks to fast growth, expect to repot every 1–2 years, or when roots poke from the drainage hole or circle the surface. Move up just one pot size, refresh the soil, and spring is the ideal time.

    8. Propagation

    This is where Syngonium shines — it’s one of the easiest plants to multiply, and cuttings root readily.

    1. Find a node: locate the little bump where a leaf meets the stem (that’s where roots form).
    2. Cut: snip just below a node, taking a section with one or two leaves.
    3. Root: stand the cutting in a glass of water on a bright windowsill. Roots usually appear within 1–2 weeks.
    4. Pot up: once roots are an inch or two long, plant into moist soil.

    A dab of rooting hormone speeds things along if you’re rooting straight into soil. Pop a few cuttings back into the mother pot to make it fuller, or share them — free plants for everyone.

    9. Common Problems & Pests

    • Leggy, sparse growth: not enough light. Move it brighter and pinch the tips to encourage bushiness.
    • Colorful variety turning green: also a light issue — pinks and creams need more brightness to hold their color.
    • Brown, crispy leaf edges: low humidity, or inconsistent watering. Boost humidity and keep the soil evenly moist.
    • Yellowing lower leaves: usually overwatering; let the top inches dry out more between drinks.
    • Pests: watch for spider mites (fine webbing, stippled leaves — thrive in dry air) and mealybugs (white cottony spots). Wipe them off and treat with neem oil, repeating weekly until they’re gone.

    Frequently Asked Questions

    Is the Syngonium toxic to pets and kids? Yes — like other aroids, it contains calcium oxalate crystals that can cause mouth irritation, drooling, and stomach upset if chewed. Keep it out of reach of cats, dogs, and toddlers, and wash your hands after taking cuttings.

    Should I let my Arrowhead vine or keep it bushy? Entirely your call. Pinch the tips regularly for a compact, mounding houseplant, or give it a moss pole and let it climb to reveal the larger, deeply lobed mature foliage. Many growers do a bit of both.

    Why are my Syngonium’s leaves losing their pink? Almost always insufficient light. Colorful cultivars need bright, indirect light to keep their blush — move it closer to a window or add a grow light.

    How fast does a Syngonium grow? Quickly, in warm months — it’s one of the faster aroids, which is why it’s so satisfying for beginners and so easy to propagate.

    Quick Gear Checklist

    Give a Syngonium bright light, water it when the top inch dries, and pinch it now and then to keep it full — that’s really all it takes. In return you get one of the fastest, most colorful, most beginner-friendly plants around, plus an endless supply of cuttings to root and share. It’s the plant that makes you feel like a natural. Happy growing, from all of us at Planty Shanty. ðŸŒą

  • ZZ Plant Care 101: The Glossy, Nearly Unkillable Plant for Low-Light Corners

    ZZ Plant Care 101: The Glossy, Nearly Unkillable Plant for Low-Light Corners

    Disclosure: This post contains affiliate links. If you buy through them, Planty Shanty may earn a small commission at no extra cost to you — it’s what keeps our care guides free. As an Amazon Associate, I earn from qualifying purchases. We only recommend gear we’d put next to our own plants.

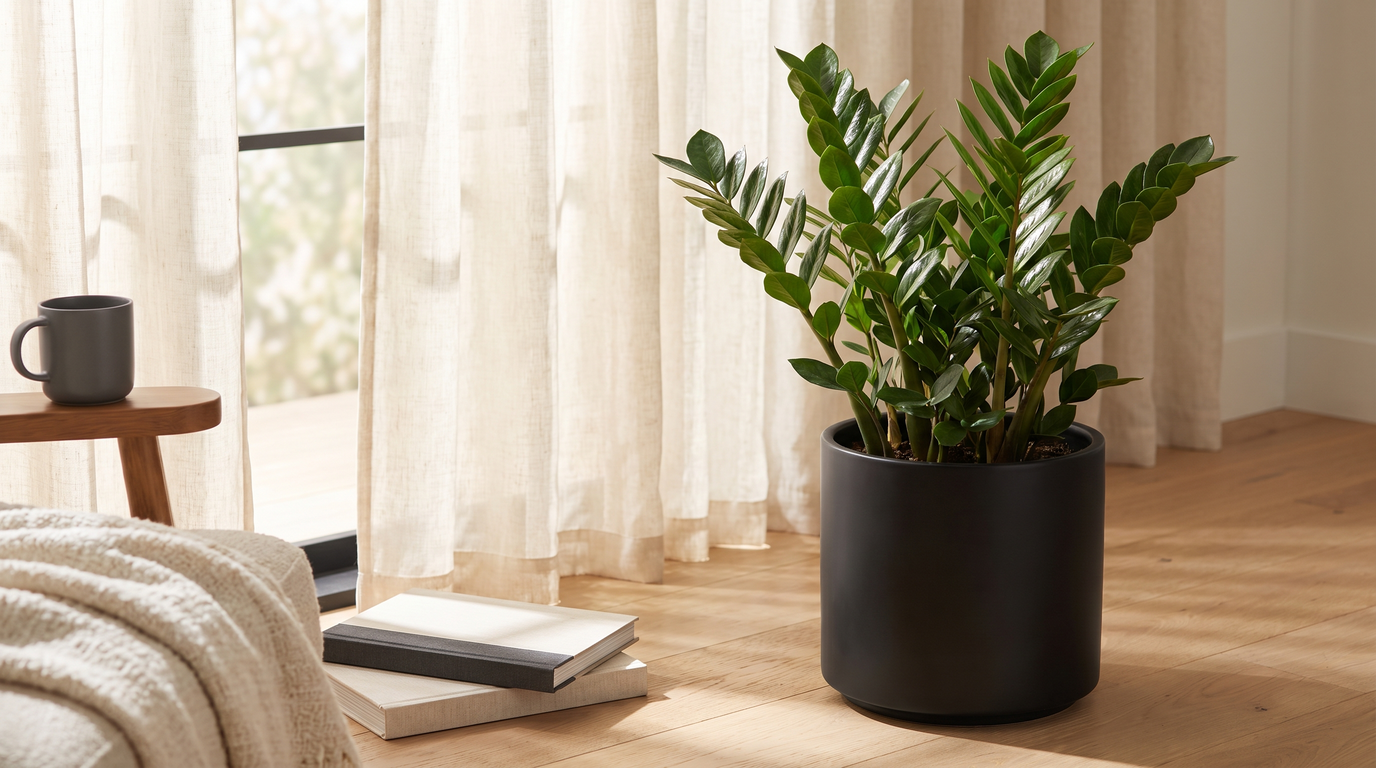
    Some plants ask for a lot. The ZZ Plant asks for almost nothing — and still manages to look like it belongs in a design magazine. Those waxy, deep-green leaflets march up each stem in perfect little rows, catching the light like they’ve been polished (they haven’t). It shrugs off dim corners, forgotten waterings, and dry apartment air, which is exactly why it’s the plant we recommend to renters, travelers, serial plant-killers, and anyone with a north-facing room they’d written off. Here’s how to keep a ZZ thriving for years — and the one habit that’s the only real way to hurt it.

    1. Meet the ZZ Plant

    The ZZ Plant (Zamioculcas zamiifolia — say “zee-zee” and never look back) is native to the dry grasslands and forests of eastern Africa, from Kenya down to South Africa. That heritage is the whole story: it evolved to survive long dry spells by storing water in fat underground rhizomes, potato-like structures hiding just below the soil line. Water in the bank means the ZZ can coast through neglect that would flatten a fussier plant.

    A few varieties you’ll run into:

    • Classic ZZ — the standard bright, glossy emerald form.
    • Raven ZZ — new growth emerges lime-green and matures to a dramatic near-black purple. Stunning, and just as tough.
    • Zenzi — a compact, curly dwarf cultivar that stays small and bushy, perfect for shelves and desks.
    • Variegated ZZ — splashed with cream; rare, slow, and pricier, but a collector’s favorite.

    The ZZ is a slow grower, so buy the size you want to live with. Patience is the price of admission — everything else about it is easy.

    2. Light Requirements

    This is the ZZ’s superpower: it tolerates low light better than almost any other houseplant, which is why you see it thriving in windowless offices and dim lobbies.

    • Best growth: bright, indirect light. This is where it puts out the most new stems and keeps that lush, full look.
    • Tolerates: medium and genuinely low light — growth just slows way down.
    • Avoid: harsh, direct afternoon sun, which can scorch and pale those glossy leaves.

    If your only spot is a dim corner and you want steady growth (not just survival), a small LED grow light on a timer keeps it happy and full. Rotate the pot a quarter-turn every few weeks so it grows evenly instead of leaning toward the window.

    3. Watering Routine

    If you only remember one thing about ZZ care, make it this: when in doubt, don’t water. Those water-storing rhizomes mean overwatering — not neglect — is the single most common way to kill a ZZ.

    • Let the soil dry out almost completely between waterings, top to bottom.
    • In practice that’s roughly every 2–3 weeks in the growing season, and as little as once a month in winter.
    • Then water thoroughly until it runs from the drainage hole, and tip out anything left in the saucer.

    Reading your plant: healthy stems stand firm and upright. Wrinkling stems or leaflets that curl inward mean it’s genuinely thirsty. Yellowing leaves and soft, mushy stalks at the base almost always mean the opposite — too much water and the start of rot. A cheap soil moisture meter takes the guesswork out entirely; wait until it reads dry near the bottom before you reach for the watering can.

    4. Ideal Soil Mix

    Drainage is everything for a plant that hates wet feet. You want a mix that holds a little moisture but dries quickly and never stays soggy.

    A good recipe is a standard indoor potting mix loosened with a generous handful of perlite for aeration. If you tend to water on the enthusiastic side, cut in some cactus and succulent soil to speed drainage even more.

    Always pot into a container with a drainage hole — this is non-negotiable for a ZZ. A terracotta pot is a smart pick because the porous clay wicks away excess moisture and makes overwatering much harder to do.

    5. Fertilizing

    ZZ Plants are famously light feeders and honestly do fine on very little. During spring and summer, a diluted balanced houseplant fertilizer once a month (or even just once or twice all season) is plenty to fuel new growth. Skip feeding entirely in fall and winter, when the plant is resting. Less is more here — overfeeding can burn the roots and brown the leaf tips.

    6. Temperature & Humidity

    Easygoing on both counts, which suits normal home life perfectly.

    • Temperature: happiest between 65–85°F. Keep it above 50°F and away from cold drafts, unheated porches, and drafty winter windows — the ZZ dislikes the cold far more than it dislikes dry air.
    • Humidity: average household humidity is fine. It won’t complain in a dry apartment, though it won’t turn down a little extra moisture either.

    No need to mist or fuss. If your winter air gets desert-dry across your whole collection, a small room humidifier is a nice touch, but the ZZ is the last plant that’ll demand one.

    7. Repotting

    Slow growth means infrequent repotting — expect to move up only every 2–3 years, or when you see rhizomes crowding the surface or pushing against (even cracking) the pot. A snug ZZ is a happy ZZ, so don’t rush it into a bigger home.

    When it’s time, choose a pot just one size up (about 2 inches wider), refresh the soil, and be gentle with those chunky rhizomes. Spring or early summer is the ideal moment. A clean pair of pruning shears is handy for trimming away any soft or rotted roots while you’re in there.

    8. Propagation

    Want free ZZ Plants? Two reliable methods, both requiring the ZZ’s signature ingredient — patience.

    1. Division (fastest): at repotting time, gently tease apart the rhizome clump so each section has a stem and roots attached, then pot each piece up separately. You’ll have full plants immediately.
    2. Leaf cuttings (slow but fun): snip a healthy leaflet, let the cut end callus for a day, then stand it in soil or water. Over a couple of months it forms a tiny rhizome, and eventually a new stem. A dab of rooting hormone improves your odds.

    Leaf propagation can take many months to show real growth, so start a few at once and forget about them — checking in later is half the fun.

    9. Common Problems & Pests

    • Yellowing leaves + mushy stems: the classic overwatering signal. Ease up, let the soil dry fully, and if the base is soft, unpot and check the rhizomes — trim any rot with clean shears and repot in fresh, gritty mix.
    • Brown, crispy leaf tips: usually too much fertilizer, or occasionally very dry, salty tap water. Flush the soil and dial back feeding.
    • Leggy, stretched, leaning stems: not enough light. Move it brighter or add a grow light, and rotate the pot regularly.
    • Pests: rare, thanks to those tough waxy leaves. Watch for the occasional mealybug (white cottony spots) or scale. Wipe them off and treat with neem oil, repeating weekly until they’re gone.
    • Dusty leaves: not a health problem, but a quick wipe with a damp cloth restores that signature glossy shine and helps the plant photosynthesize.

    Frequently Asked Questions

    Is the ZZ Plant toxic to pets and kids? Yes — all parts contain calcium oxalate crystals, which can cause mouth irritation, drooling, and stomach upset if chewed. It’s not usually dangerous, but keep it out of reach of curious cats, dogs, and toddlers, and wash your hands after pruning.

    Why isn’t my ZZ growing? Probably nothing’s wrong — ZZ Plants are naturally slow, and they nearly stop in winter’s low light. If it’s putting out no new stems for a very long stretch, give it brighter light and confirm you’re not overwatering.

    Can a ZZ Plant really survive in a room with no windows? It can survive surprisingly long on ambient light alone, which is why they’re office favorites — but “survive” isn’t “thrive.” For steady new growth in a windowless space, add a small grow light on a timer.

    How often should I water in winter? Often just once a month, sometimes even less. Cold temperatures and short days mean slow growth and slow drying, so always check that the soil is dry deep down before watering.

    Quick Gear Checklist

    Give a ZZ Plant a spot with some light, water it far less than feels natural, and then mostly leave it alone — that’s the entire secret. It rewards benign neglect with years of glossy, sculptural greenery and asks almost nothing in return. If you’re building confidence as a plant parent (or just want one gorgeous thing you can’t kill), the ZZ belongs on your shelf. Happy growing, from all of us at Planty Shanty. ðŸŒą

  • Snake Plant Care 101: The Nearly Unkillable Beginner Favorite

    Snake Plant Care 101: The Nearly Unkillable Beginner Favorite

    Disclosure: This post contains affiliate links. If you buy through them, Planty Shanty may earn a small commission at no extra cost to you — it’s what keeps our care guides free. As an Amazon Associate, I earn from qualifying purchases. We only recommend gear we’d put next to our own plants.

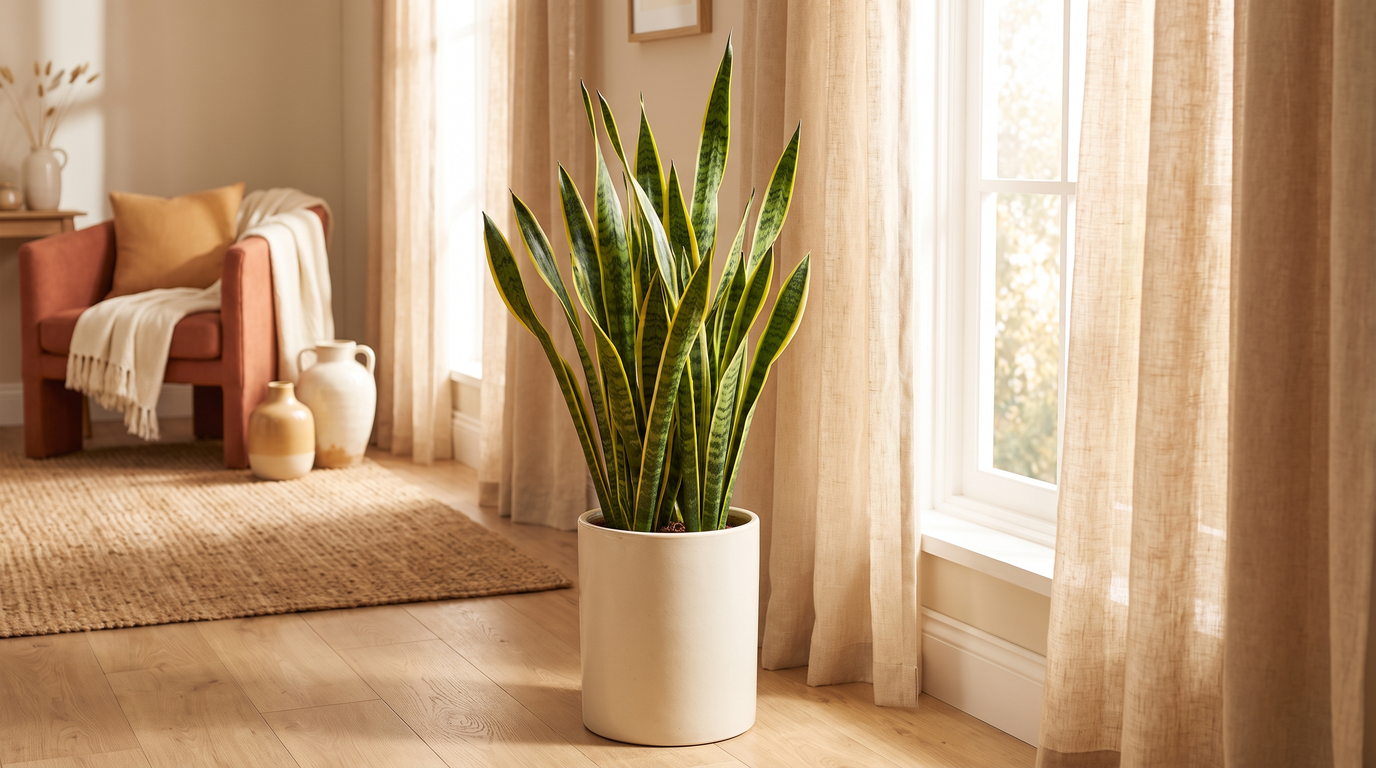
    If you want one plant that forgives forgetfulness, low light, and the occasional two-week vacation, meet the Snake Plant. It’s the plant we hand to every nervous beginner — architectural, air-purifying, and almost impossible to kill. Here’s how to keep yours thriving (and how to avoid the one mistake that actually can hurt it).

    1. Meet the Snake Plant

    Snake Plant (Dracaena trifasciata, still widely sold as Sansevieria), also called Mother-in-Law’s Tongue, grows stiff, upright leaves in gorgeous varieties:

    • Laurentii — the classic, with buttery yellow leaf margins.
    • Zeylanica — wavy green banding, no yellow edge.
    • Moonshine — pale, silvery-green leaves; very modern.
    • Cylindrica — round, spear-like leaves you can almost braid.

    They store water in those thick leaves like a succulent, which is exactly why they’re so drought-tolerant and beginner-proof.

    2. Light Requirements

    Snake Plants are famously flexible on light — one reason they survive offices and dim hallways.

    • Best growth: bright, indirect light.
    • Tolerates: medium and even low light (growth just slows).
    • Avoid: long hours of harsh direct sun, which can bleach the leaves.

    Stuck in a dim corner? A small LED grow light keeps it growing and the variegation crisp.

    3. Watering Routine

    This is the only place people go wrong: Snake Plants hate wet feet. Overwatering — not neglect — is the #1 killer.

    • Let the soil dry out completely between waterings, top to bottom.
    • Water roughly every 2–4 weeks, less in winter.
    • Wrinkled or curling leaves = thirsty. Soft, mushy, yellowing bases = overwatered.

    When in doubt, wait — and a cheap soil moisture meter removes the guesswork entirely.

    4. Ideal Soil Mix

    Drainage is everything. Use a gritty, fast-draining cactus and succulent soil mix, or stir a generous handful of perlite into regular potting soil for extra aeration.

    Always plant in a pot with a drainage hole — a terracotta pot is ideal because it wicks away excess moisture.

    5. Fertilizing

    Snake Plants are light feeders. A diluted balanced houseplant fertilizer once or twice during spring and summer is plenty. Skip feeding entirely in fall and winter.

    6. Temperature & Humidity

    Easygoing on both: 60–85°F and normal household humidity suit them perfectly. They dislike the cold — keep them above 50°F and away from drafty windows and doors in winter.

    7. Repotting

    Snake Plants actually like being a little root-bound, so repot only every 2–3 years, or when roots crack the pot or circle the surface. Move up just one pot size and refresh the soil.

    8. Propagation

    Two easy ways to make more (free plants!):

    1. Division: slide the plant out, separate a clump with roots attached, and pot it up. Fastest method.
    2. Leaf cuttings: cut a healthy leaf into 3–4″ sections, let them callus a day, then stand them in soil or water. A dab of rooting hormone speeds things along.

    Note: variegated types (like Laurentii) lose their yellow edge when grown from leaf cuttings — divide those instead to keep the color.

    9. Common Problems

    • Mushy, falling leaves: classic overwatering and root rot — let it dry out, trim rot, repot in fresh gritty mix.
    • Brown, crispy tips: usually inconsistent watering.
    • Leaves leaning or flopping: too little light, or the pot’s too big and holding water.
    • Pests: rare, but wipe off any mealybugs and treat with neem oil.

    Frequently Asked Questions

    Is Snake Plant toxic to pets? Yes — mildly. It can cause nausea or drooling if cats or dogs chew it, so keep it out of reach.

    Does it really clean the air? It was part of NASA’s classic clean-air study and does absorb some toxins; it also releases oxygen at night, making it a popular bedroom plant. Treat air-purifying as a nice bonus, not a superpower.

    How often should I water in winter? Often as little as once a month — cold, low light means slow growth and slow drying. Always check the soil first.

    Quick-Start Gear Checklist

    Give a Snake Plant bright-ish light and far less water than you think it needs, and it will quietly thrive for years — often outliving every other plant in the house. It’s the ultimate confidence-builder for a new plant parent. Happy growing, from all of us at Planty Shanty. ðŸŒą

  • The Healing Herb Cabinet: 12 Medicinal Herbs to Grow at Home

    The Healing Herb Cabinet: 12 Medicinal Herbs to Grow at Home

    Disclosure: This post contains affiliate links. If you buy through them, Planty Shanty may earn a small commission at no extra cost to you. As an Amazon Associate, I earn from qualifying purchases.

    This article is for general educational purposes and is not medical advice. Herbs can interact with medications and conditions — talk to a qualified healthcare provider before using them, especially if pregnant, nursing, or treating a health issue.

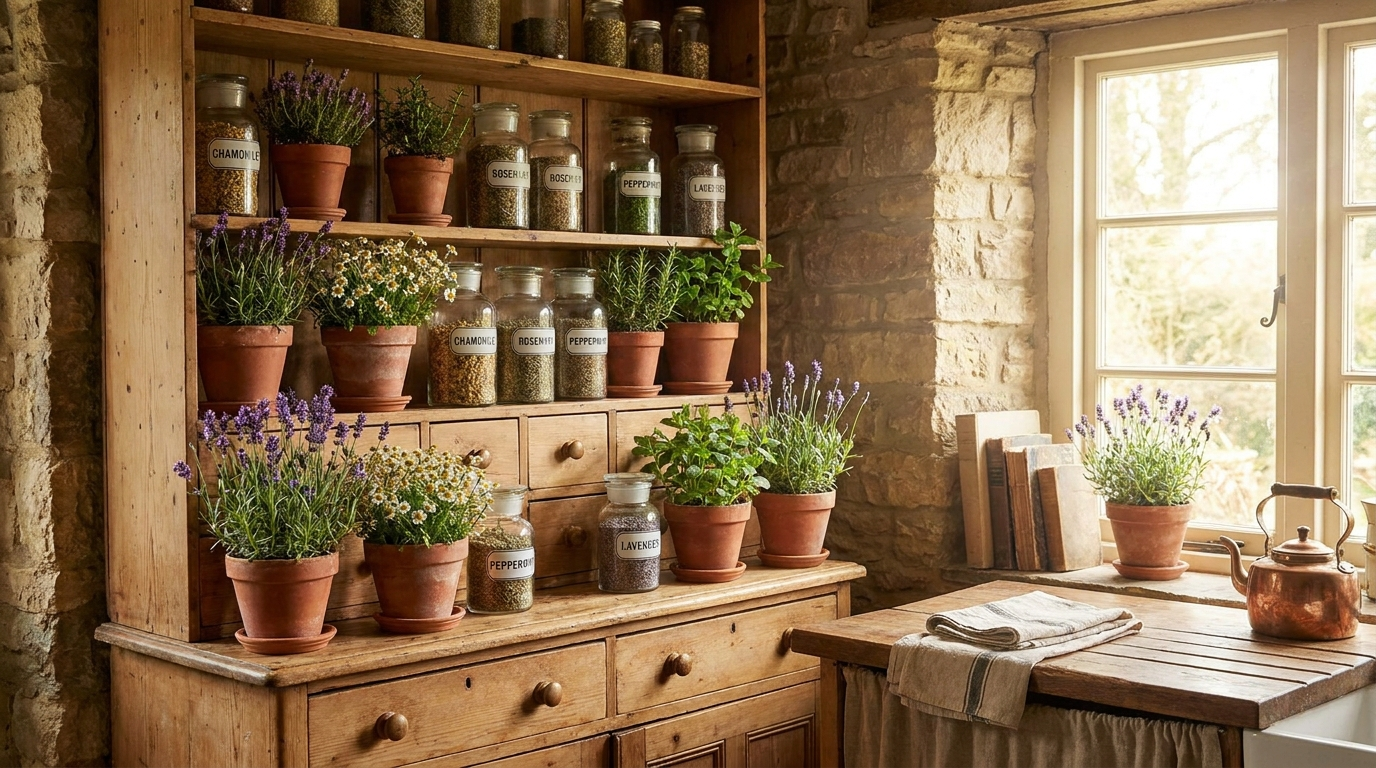
    There’s something deeply satisfying about walking to a sunny windowsill, snipping a few leaves, and steeping a cup of tea you grew. A healing herb cabinet — a small collection of medicinal and culinary herbs — is the most useful, beginner-friendly garden you can start. Most of these thrive in a pot on a bright sill, and each has a long history of traditional use.

    Here are twelve to build your cabinet around, how to grow them, and the simple gear that makes harvesting and storing them easy.

    Grow these first (easiest + most useful)

    1. Chamomile

    Gentle, apple-scented flowers traditionally brewed as a calming bedtime tea. Loves full sun and well-drained soil; let it dry slightly between waterings. Start from chamomile seeds.

    2. Peppermint

    Vigorous and nearly unkillable — grow it in its own pot (it takes over gardens). Traditionally used for digestion. Prefers moist soil and part sun. Grab a peppermint plant or seeds.

    3. Lemon Balm

    A lemony member of the mint family, long used to ease stress and lift mood. Tough, fast, and happy in a pot. Try lemon balm seeds.

    4. Lavender

    Beautiful, fragrant, and calming — great for tea, sachets, and sleep. Needs the sunniest spot and gritty, fast-draining soil (it hates wet feet). Start with a lavender plant.

    5. Holy Basil (Tulsi)

    Revered in Ayurveda as an adaptogen for stress. Warm, clove-like, and easy from tulsi seeds in a bright, warm spot.

    6. Calendula

    Cheerful orange flowers traditionally infused into skin-soothing salves. Blooms fast from calendula seeds and loves full sun.

    The kitchen-and-medicine-cabinet crossovers

    7. Rosemary

    Piney and antioxidant-rich; great for cooking and memory-boosting folklore. Wants sun and sharp drainage. A rosemary plant is the easy start.

    8. Thyme

    Tiny leaves with big antimicrobial tradition (think old-fashioned cough syrups). Drought-tolerant and perfect for pots. Sow thyme seeds.

    9. Sage

    Earthy and traditionally used as a sore-throat gargle. Loves sun and dry-ish soil. Begin with a sage plant.

    10. Ginger

    Grow it from a plump grocery-store rhizome in a wide, shallow pot of rich soil, kept warm and moist. Classic for nausea and digestion. Or start with a ginger root growing kit.

    11. Echinacea (Coneflower)

    A hardy perennial traditionally used to support immunity. Gorgeous purple blooms from echinacea seeds; full sun.

    12. Aloe Vera

    The ultimate low-effort healer — snap a leaf for its cooling gel on minor burns. Treat it like a succulent: bright light, water only when bone-dry. Pick up an aloe vera plant.

    Setting up your herb cabinet

    You don’t need much — just light, the right pots, and a way to harvest and store:

    Frequently Asked Questions

    Which healing herb should a total beginner start with? Peppermint, lemon balm, or aloe — all three are forgiving and useful within weeks.

    Can I grow these indoors year-round? Yes, with enough light. A south-facing window or a grow light keeps most of them productive through winter.

    How do I dry herbs? Snip in the morning, bundle stems with twine, and hang in a dry, airy spot out of direct sun for 1–2 weeks — or use a drying rack. Store in airtight amber jars away from light.

    Start with three or four, get a feel for them, and let your cabinet grow. There’s real magic in healing yourself with something you raised from seed. ðŸŒŋ — Planty Shanty

  • The Best Grow Lights for Indoor Plants (2026 Buyer’s Guide)

    The Best Grow Lights for Indoor Plants (2026 Buyer’s Guide)

    Disclosure: This post contains affiliate links. If you buy through them, Planty Shanty may earn a small commission at no extra cost to you — it’s what keeps our guides free. As an Amazon Associate, I earn from qualifying purchases. We only recommend gear we’d use on our own plants.

    If your plants are getting leggy, pale, or refusing to grow through the darker months, they’re almost certainly starving for light. A good grow light fixes that overnight — and modern LED options are cheap, efficient, and actually pretty enough to leave on a shelf. Here’s how to choose the right one, plus our favorite picks by situation.

    What to Look For in a Grow Light

    Before you shop, four things matter more than brand names:

    1. Full spectrum. Look for “full-spectrum” LEDs that cover the blue and red wavelengths plants use. Blue drives lush foliage; red supports flowering.
    2. Enough intensity (and the right distance). Small clip lights are great a few inches from a single plant; a shelf of plants needs a panel or bar.
    3. A built-in or add-on timer. Plants want a consistent 12–16 hours a day. A grow light with a timer makes it truly set-and-forget.
    4. A look you can live with. Warm-white full-spectrum lights blend into a room far better than the old pink/purple “blurple” panels.

    Our Picks by Situation

    Best All-Around: Full-Spectrum LED Panel

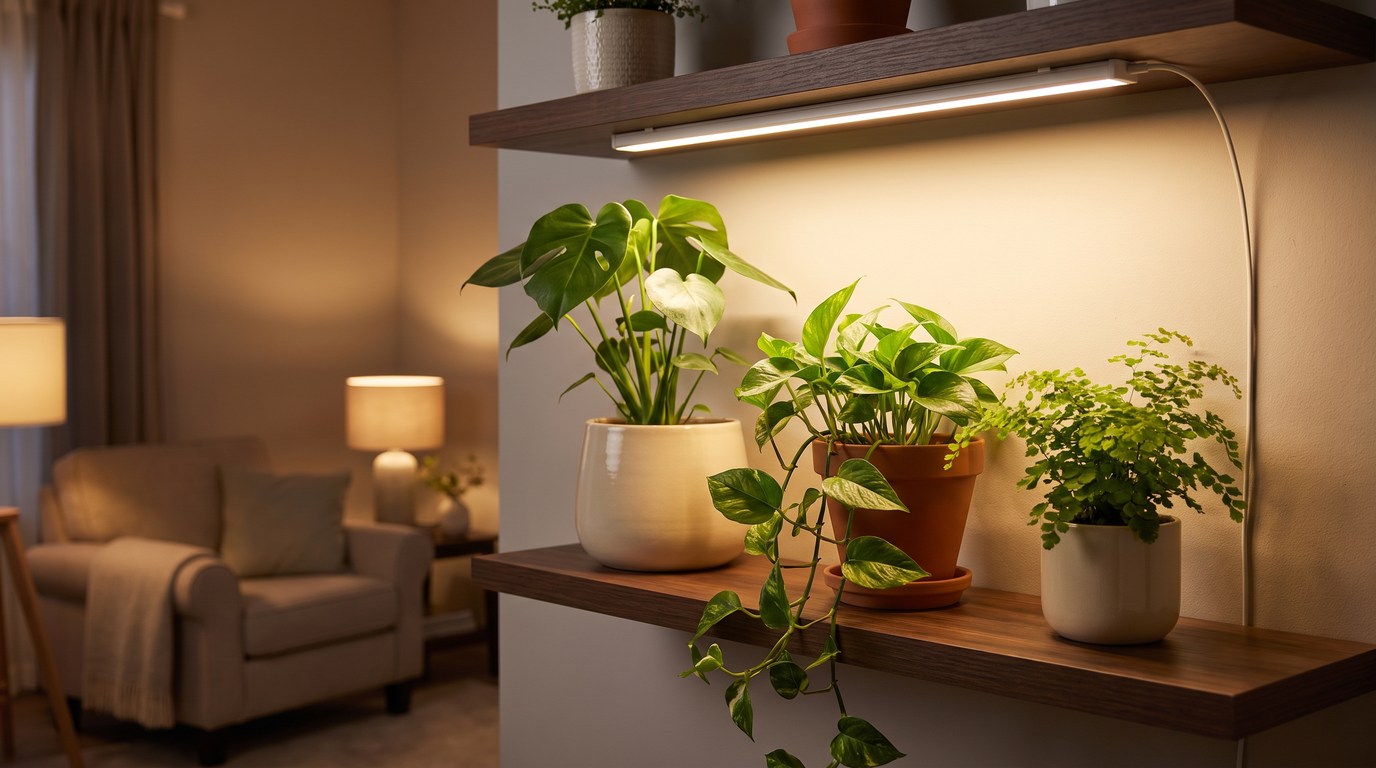
    For a shelf, a plant corner, or a growing collection, a full-spectrum LED grow light panel gives you the most coverage for the money. Hang it above a plant shelf and you can grow almost anything indoors, year-round.

    Best for a Single Statement Plant: Clip-On Grow Light

    Got one dramatic Monstera or Fiddle Leaf Fig in a dim corner? A clip-on grow light clamps onto a shelf or table and aims exactly where you need it — flexible, cheap, and easy to reposition.

    Best for Shelves & Cabinets: LED Grow Light Bars

    If you’re running an IKEA greenhouse cabinet or a multi-tier plant stand, slim LED grow light bars mount discreetly under each shelf and light every level evenly. This is the setup serious hobbyists swear by.

    Best “Doesn’t Look Like a Grow Light”: Grow Light Bulb

    Want something that screws into a lamp you already own? A full-spectrum grow light bulb turns any fixture into a plant light — perfect for renters and anyone who hates visible gear.

    Best Aesthetic Pick: Standing Grow Light

    For a floor plant or a styled corner, a standing grow light looks like a modern floor lamp while quietly doing the work. Form and function.

    How to Use Your Grow Light (So It Actually Works)

    • Distance: start roughly 12–18″ above foliage for a panel, closer for low-wattage clip lights. If leaves look bleached, raise it; if plants stretch toward it, lower it.
    • Duration: 12–16 hours daily. Pair it with a grow light with a timer and forget about it.
    • Pair with the right care: more light means faster growth, so plants may drink a little more — a soil moisture meter keeps you from over- or under-watering as they wake up.

    Frequently Asked Questions

    Do grow lights really work? Yes — plants can’t tell sunlight from the right artificial spectrum. A full-spectrum LED genuinely replaces or supplements a sunny window, especially in winter.

    Are LED grow lights expensive to run? No. Modern LEDs sip electricity — running one 12–16 hours a day typically costs just a few dollars a month.

    Can I use a regular LED bulb instead? Not really. Standard bulbs lack the intensity and full spectrum plants need. A dedicated full-spectrum grow light is worth the small upgrade.

    How many plants can one light cover? Depends on size — a clip light covers one plant, a panel or a pair of bars covers a whole shelf. Match the light to the footprint you’re trying to fill.

    The Quick Buying Checklist

    The right grow light is genuinely the highest-impact upgrade you can make as an indoor gardener — it’s the difference between plants that survive winter and plants that grow through it. Pick the one that fits your space, set a timer, and watch them take off. Happy growing, from all of us at Planty Shanty. ðŸ’ĄðŸŒŋ

  • Philodendron Care 101: The Foolproof Trailing Houseplant

    Philodendron Care 101: The Foolproof Trailing Houseplant

    Disclosure: This post contains affiliate links. If you buy through them, Planty Shanty may earn a small commission at no extra cost to you. As an Amazon Associate, I earn from qualifying purchases. We only recommend gear we’d put next to our own plants.

    If the Monstera is the showstopper, the Philodendron is the effortless workhorse of the houseplant world — fast-growing, forgiving, and gorgeous whether it’s trailing off a shelf or climbing a pole. It’s one of the best plants for beginners and a favorite of collectors, and once you know a few basics it practically grows itself.

    1. Meet the Philodendron

    There are hundreds of varieties, but the easiest and most common include:

    • Heartleaf Philodendron (Philodendron hederaceum) — classic glossy heart-shaped leaves; nearly indestructible.
    • Philodendron Brasil — heartleaf with painterly lime-and-green variegation.
    • Philodendron Micans — velvety, iridescent bronze-green leaves.
    • Philodendron Birkin — upright, with fine white pinstripes.

    Care is nearly identical across the trailing types, so master one and you’ve mastered them all.

    2. Light Requirements

    Philodendrons love bright, indirect light but are famously tolerant of medium and even lower light — which is why they thrive in offices and dim apartments.

    • Best growth & variegation: bright, indirect light.
    • Tolerates: medium to low light (variegated types may revert toward solid green).
    • Avoid: direct sun, which scorches the leaves.

    In a dark spot, a full-spectrum grow light keeps growth full and colorful.

    3. Watering Routine

    Let the top 1–2 inches of soil dry out between waterings. Philodendrons are more forgiving of a missed watering than an overwatering.

    • Droopy leaves usually mean thirsty (they bounce back fast); yellowing leaves usually mean overwatered.
    • A soil moisture meter takes the guesswork out.

    Always use a pot with drainage and empty the saucer.

    4. Ideal Soil Mix

    As aroids, philodendrons want a chunky, airy, fast-draining mix. Use a ready-made aroid potting mix, or make your own with potting soil, perlite, and orchid bark.

    5. Fertilizing

    Feed with a balanced houseplant fertilizer every 4–6 weeks in spring and summer. Skip winter feeding when growth slows.

    6. Temperature & Humidity

    Comfortable at 65–85°F (18–29°C); keep above 55°F and away from cold drafts. They tolerate normal household humidity but grow lusher above 50% — a small humidifier helps, especially for velvety types like Micans.

    7. Trail or Climb

    • Trailing: let the vines spill from a hanging planter or high shelf.
    • Climbing: give it a moss pole and the leaves grow noticeably larger.

    Pinch or prune leggy vines with clean pruning shears to keep it bushy.

    8. Propagation

    Almost too easy:

    1. Snip a cutting just below a node (the bump where a leaf meets the stem).
    2. Root it in water (change weekly) or moist sphagnum moss.
    3. Once roots reach 2–3 inches, pot it up — or tuck it back into the same pot to make the plant fuller.

    9. Common Problems

    • Yellow leaves: usually overwatering — let it dry more.
    • Brown crispy tips: low humidity or inconsistent watering.
    • Leggy vines: more light + prune to encourage branching.
    • Pests: treat mealybugs or spider mites with neem oil.

    Frequently Asked Questions

    Is Philodendron toxic to pets? Yes — it contains calcium oxalate crystals and is toxic to cats and dogs if chewed. Keep it out of reach.

    Philodendron vs Pothos — what’s the difference? They look similar but philodendron leaves are thinner and heart-shaped with a softer texture; both are easy and cared for almost identically.

    How fast does it grow? Very fast in good light — several inches of vine a month in the growing season.

    Quick-Start Gear Checklist

    Give a Philodendron decent light and the occasional drink and it’ll reward you for years. It’s the perfect confidence-builder — and honestly still a collector favorite once you have a shelf full. Happy growing, from all of us at Planty Shanty. ðŸŒŋ